Thursday, April 25, 2013

Toaster Oven Challenge: Crunchy and Moist Banana Bread


Crunchy and moist banana bread? Yes! It's totally possible!  This was made in my toaster oven.

Most likely all the ingredients are already in your pantry:


So all you need to do is mix the dry, then mix the wet, mash the bananas and throw it all together.


Enlist a helper to mash the bananas


Butter the pan and then dust with flour.  I used my round pan again because I didn't have a loaf pan.


I dug a little well in the middle of the batter so that the banana bread would look less like a cake and more like banana bread. 


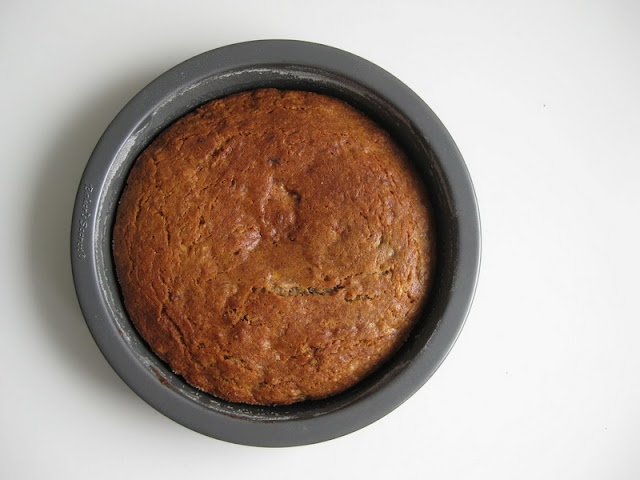
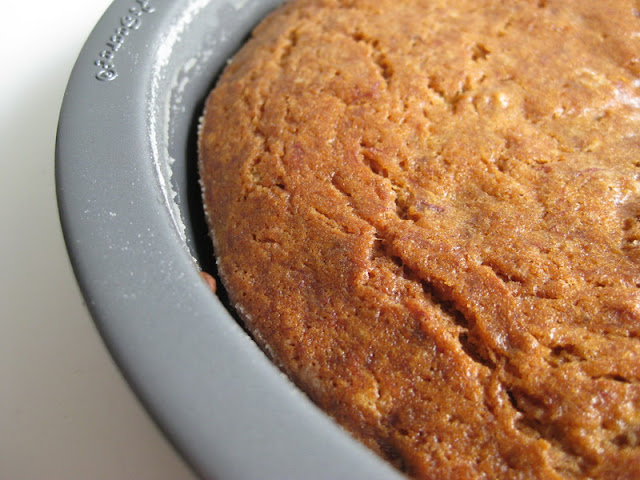
And this is what it looks like out of the oven.


When it's fresh out of the oven, the top is nice and crunchy while the inside is nice and moist.  Le yum!


Here's what you need:
1/2 cup sugar
1/4 cup butter
1 egg
1/8 tsp baking powder
1/4 tsp baking soda
3/4 cup flour
1 pinch of nutmeg
2 large bananas
1 tsp of vanilla

Instructions:
1.  Mix sugar, butter, and egg in a bowl.  Set aside
2.  Combine baking powder, baking soda, flour, nutmeg
3.  Mash bananas
4.  Put it all in one bowl, add vanilla, and mix.  Don't overmix!

Put it in your pan and bake in the toaster oven at 300F for 1 hour. 

Enjoy!
Follow my blog with Bloglovin

Wednesday, April 17, 2013

Toaster Oven Challenge: Cake Mix Cake


So today was pantry cleaning day and I had a box of cake mix that we purchased at some point.  In the spirit of continuing my toaster oven challenge, I decided to use it.

Originally, bunny and I were going to make mini cupcakes since the trays fit in my toaster oven.


Seemed like a good idea.  We followed the box instructions and filled the wells up high.  Then we followed the box instructions for baking but added an additional 10 minutes of cooking time.


They looked so cute but it was so hard to pop them out so we ate them right out of the baking pan. 


Since we weren't too successful with the mini cupcakes, we used the remaining batter in a standard 9" cake pan. 


Not a pretty looking cake but a little icing sugar and some berries will do wonders in making this a prettier cake.  

Verdict?  Stick to my tried and true recipes like my chocolate bundt cake.  If these mini cupcakes were for school, I'd be scrambling to make something else.

Follow my blog with Bloglovin

Monday, April 15, 2013

Toaster Oven Challenge: Clumpy Granola Recipe + the Green Living Show


I love granola.   The clumpier, the better.  I eat a lot of it but always thought it was a bit of an energy guzzler to make.  So this was the perfect choice for the toaster oven.  The best part about using the toaster oven for clumpy granola is that it makes the perfect portion to fit a mason jar.

Here's what you need (yes, the pic shows artificial vanilla.  That's all I had but it'll taste much better with pure vanilla extract).


Recipe:
2 cups of oats (Use large flake oats.  The quick kind won't clump together as nicely)
1 tsp cinnamon
1/2 tsp salt
3 tbsp olive oil
1 tsp vanilla
1/4 cup syrup
1 egg white
1 tbsp brown sugar (optional if you like a sweeter granola)

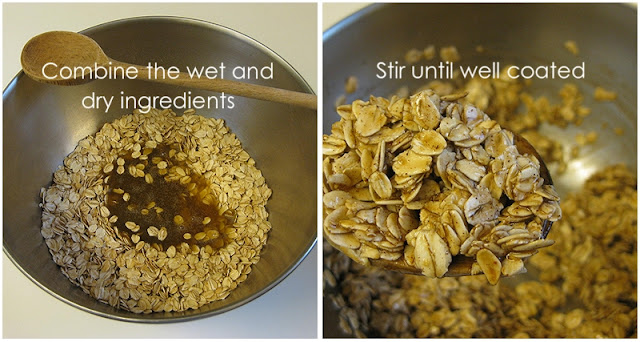
The rest is pretty simple... mix the dry together.  The mix the wet ingredients together.


Then combine the two bowls


Press firmly into the pan but leave a hole in the centre.  My toaster oven pan is raised in the middle and it doesn't seem to cook very well in the centre.  If yours is flat, then fill in the hole.


Pop it in the oven at 300F for about 45 minutes.  You can check back every 15 minutes to stir it but I don't bother.  I like to break it up myself.  Sometimes, it comes out as one whole piece!

Here's what it looks like out of the oven.  Make sure to let it cool before you try to break it apart.


We like it with yogurt or with fruit.


This weekend was the Green Living Show in Toronto.  My sister asked me to go with her so I decided to make some granola for us to snack on.  Silly me... why would I bring crunchy granola to a crunchy show?  We sampled a lot of granola and by the end, I think I cried "no more granola!" and "I'm so tired!"

By the end of the show, my sister, my mom, and I were exhausted and happy from all the shopping and taste testing of organic this and that.   We loved the Rowe Farms wing sampling, and all of the samples from Green Beaver.  Here are some pics from the event.  All fuzzy, all from my phone.


1.  Orange Drop -  It wasn't all just shopping...  we learned about the lifecycle of a battery.  We had our picture taken doing something goofy
2.  Zazubean Chocolate - le yum!  We got the chocolate/chilli combo and the chocolate/orange combo.  The chocolate is also infused with Yerba Mate so I had to get this for hubby.
3.  Rosewood Estates Honey - the best honey ever!

Some random pics...


My bag was also full of stickers and enviro glue for the kids so they were very happy the next morning.   The best find though, was discovering Purple Daze Lavendar Farm.   Road trip in June?


Follow my blog with Bloglovin

Thursday, April 11, 2013

Toaster Oven Challenge: Chickpea Popcorn


In our house, roasted chickpeas are called "chickpea popcorn". It sounds so much more snack like and the kids love it. This is the perfect recipe for a toaster oven. All you need is a can of chickpeas, a pinch of salt, 1-2 tbsp of olive oil and some paprika.

Make sure you rinse the chickpeas and pat dry with a paper towel.  Otherwise, the chickpeas won't come out crunchy


Drizzle with olive oil and then add your seasoning.  If I'm making this for me and hubby, I'll use cayenne pepper for a bit of kick.


Bake in the toaster oven at 300F for 50 minutes.  Let it cool and eat!


It's been 2 months since I've actually used my oven... and I don't miss it at all!

Follow my blog with Bloglovin

Thursday, April 04, 2013

Tutorial: DIY Superhero Capes


The boys are totally into superheroes now.  Everything is about good and evil, punching, kicking, web slinging, extra vision, etc.  I love that they are into creative play so I made them some new capes.  Their old capes were too short and the necks were too small. The new capes are also reversible which means twice the amount of fun!  Baby Bunny loves Spiderman and Batman so naturally he got those for his cape.  Josh chose so many different heroes but in the end, I made him a Superman/Bizarro cape.  The capes fit them both, but the superman/bizarro is a couple of inches longer. 

Couldn't pry this away from Josh long enough to iron it...

Whenever we go out, Baby Bunny always wants to bring his superhero cape. We get compliments all the time and since they are so easy to make, here's a tutorial for you so you can make your own.

Materials:
1.  Old bib to trace
2.  1/2m of cotton fabric
3.  Scrap fabric for the logo (optional)
4.  Heat n Bond
5.  1" velcro

How to:
1.  Use your child's favourite bib as a template for your cape.  Make sure you choose one that fits now.
2.  Trace the neck outline of the bib onto your fabric.  Keep drawing a diagonal line to your desired length.  Cut 2 pieces
3.  Choose or draw your design onto some Heat n Bond (see my tutorial here) and iron it to your scrap fabric.  Iron your scrap fabric onto the RIGHT side of one of your cape pieces.  Top stitch the logo for extra security.  If you want yours to be reversible, then you'll do this step again with the other cape piece.
4.  Place the 2 cape pieces RIGHT sides together (logo facing in) and sew all the way around, leaving a small gap (about 3") for turning.
5.  Turn the cape inside out, press with a hot iron, and topstitch around the entire cape, closing up your small opening.
6.  Trim the velcro to fit the cape and sew it on.  Try it on your little one and you're done!


Here's the little guy with his cape.  When he first got it, he was so excited that he only wore it on his front.  Now he wears it on his back.


This kid is so funny


Hope you enjoyed this tutorial!  Please leave a comment if you use this tutorial.  I would love to see some pics!


Follow my blog with Bloglovin