Showing posts with label recipe. Show all posts

Thursday, April 25, 2013

Toaster Oven Challenge: Crunchy and Moist Banana Bread


Crunchy and moist banana bread? Yes! It's totally possible!  This was made in my toaster oven.

Most likely all the ingredients are already in your pantry:


So all you need to do is mix the dry, then mix the wet, mash the bananas and throw it all together.


Enlist a helper to mash the bananas


Butter the pan and then dust with flour.  I used my round pan again because I didn't have a loaf pan.


I dug a little well in the middle of the batter so that the banana bread would look less like a cake and more like banana bread. 


And this is what it looks like out of the oven.


When it's fresh out of the oven, the top is nice and crunchy while the inside is nice and moist.  Le yum!


Here's what you need:
1/2 cup sugar
1/4 cup butter
1 egg
1/8 tsp baking powder
1/4 tsp baking soda
3/4 cup flour
1 pinch of nutmeg
2 large bananas
1 tsp of vanilla

Instructions:
1.  Mix sugar, butter, and egg in a bowl.  Set aside
2.  Combine baking powder, baking soda, flour, nutmeg
3.  Mash bananas
4.  Put it all in one bowl, add vanilla, and mix.  Don't overmix!

Put it in your pan and bake in the toaster oven at 300F for 1 hour. 

Enjoy!
Follow my blog with Bloglovin

Wednesday, April 17, 2013

Toaster Oven Challenge: Cake Mix Cake


So today was pantry cleaning day and I had a box of cake mix that we purchased at some point.  In the spirit of continuing my toaster oven challenge, I decided to use it.

Originally, bunny and I were going to make mini cupcakes since the trays fit in my toaster oven.


Seemed like a good idea.  We followed the box instructions and filled the wells up high.  Then we followed the box instructions for baking but added an additional 10 minutes of cooking time.


They looked so cute but it was so hard to pop them out so we ate them right out of the baking pan. 


Since we weren't too successful with the mini cupcakes, we used the remaining batter in a standard 9" cake pan. 


Not a pretty looking cake but a little icing sugar and some berries will do wonders in making this a prettier cake.  

Verdict?  Stick to my tried and true recipes like my chocolate bundt cake.  If these mini cupcakes were for school, I'd be scrambling to make something else.

Follow my blog with Bloglovin

Friday, October 19, 2012

Recipe: Chococolate Sugar Cookies - Owls!

Recently we made gingerbread bat cookies which the kids loved. Today we made chocolate sugar cookie owls. They loved these even more!


To make:  Go to my Sugar Cookie Recipe Post and print off the recipe.  Add 3 TBSP of cocoa after you add the salt and flour.  Then follow the rest of the instructions! 

Note:  The dough will look like this


Cut out the owl eyes using a straw


Ta da!


Only  15 days until Halloween!


 Happy Baking!

Monday, October 15, 2012

Recipe: Apple Cinnamon Bread

We love banana bread and banana muffins but after a while, the kids start complaining "banana muffin again?" So yesterday we tried this apple cinnamon bread recipe from Two Peas & Their Pod.   The recipe was so easy to follow and uses every day ingredients that are in my refrigerator/pantry.

This is what it looked like when I made it.  I need a shorter pan.


This is what it looked like when they made it:

Photo Credit:  Two Peas & Their Pod

The recipe says to let it cool for 10 min and then take it out.  It started to crumble a bit so I cut the loaf in two.


That's ok though... it was just for us


Had to fancy it up a little for the kids.


 Le Yum!

Tuesday, August 21, 2012

Recipe: Tomato, Chicken and Basil Rigatoni

Summer is slowly starting to come to an end and this is usually when I try to eat whatever we have grown in the garden. This recipe is so easy to make and it's perfect for lunch or dinner outside.


Here's what you need:
1 or 2 tomatoes from the garden
4-5 basil leaves
Left over grilled chicken cut into chunks
Sliced mushrooms
Rigatoni


Instructions:
1.  Bring a pot of salted water to boil.  Add pasta and cook according to package directions
2.  Chop your tomatoes, basil, chicken and mushrooms
3.  Add some olive oil to a medium sized pot and cook your tomatoes and basil over medium heat for about 2-3 minutes.  Stir.  Add mushrooms and continue to stir.  Add chicken and simmer for about 5 minutes.  If the mixture gets a little dry, add some water or another tomato.
4.  Add cooked pasta and continue to simmer for another 5 minutes. 
5.  Serve!

It's so nice with some salad


So healthy and fresh tasting.  I love summer cooking.  Enjoy!
Thursday, June 07, 2012

Recipe: Chocolate Bundt Cake

I love chocolate cake.  It's one thing that I would never be able to give up.  There's nothing like having a slice with a cold glass of milk, right before bed.  Le yum!  

Today I am sharing with you the best ever chocolate bundt cake recipe.   I've never tried this recipe with a regular pan because I've been trying to master the bundt.  Please make sure you follow the recipe... once I was distracted and accidentally swapped the measurements for the cocoa and the sugar.   We named the output, "crazy cake" -- it makes you crazy when you eat it due to all of that cocoa.

Now that I've finally mastered the bundt pan, there will be many more chocolate cakes in my future! 


Dry Ingredients:
1 2/3 cup flour
1 1/2 cup sugar
1/2 cup cocoa
1 1/2 tsp baking soda
1 tsp salt
1/2 tsp baking powder

Wet Ingredients:
2 eggs
1/2 cup vegetable oil
1 1/2 cup milk
1 tsp vanilla


Directions:


Put it in the oven for 55-60 min at 350F.  Let it cool for about 2-3 hours.  Turn the pan over on top of a large plate.  Lightly tap to release the cake.   Note:  If you have extra cocoa, dust the bundt with cocoa instead of floor.  Works just as well and adds a bit of oomph!

Leave it plain or decorate it.  It's up to you!


We use candles, even when it's not for a birthday


 I love this cake, it's "le yum"!

 Happy Baking,

Friday, April 06, 2012

Happy Easter Cookies

Easter Cookies! Well, maybe they are just "spring" cookies. The kids and I made these this week to get ready for our Easter Weekend. Baking and Icing cookies with a pre-schooler and toddler was way more involved than I thought it would be. Joshie and I baked together all the time but it was just the two of us. No one tugging on my pants yelling "mine" or demanding to touch everything. The addition of baby bunny to our baking party meant lots of flour and stuff on the floor.


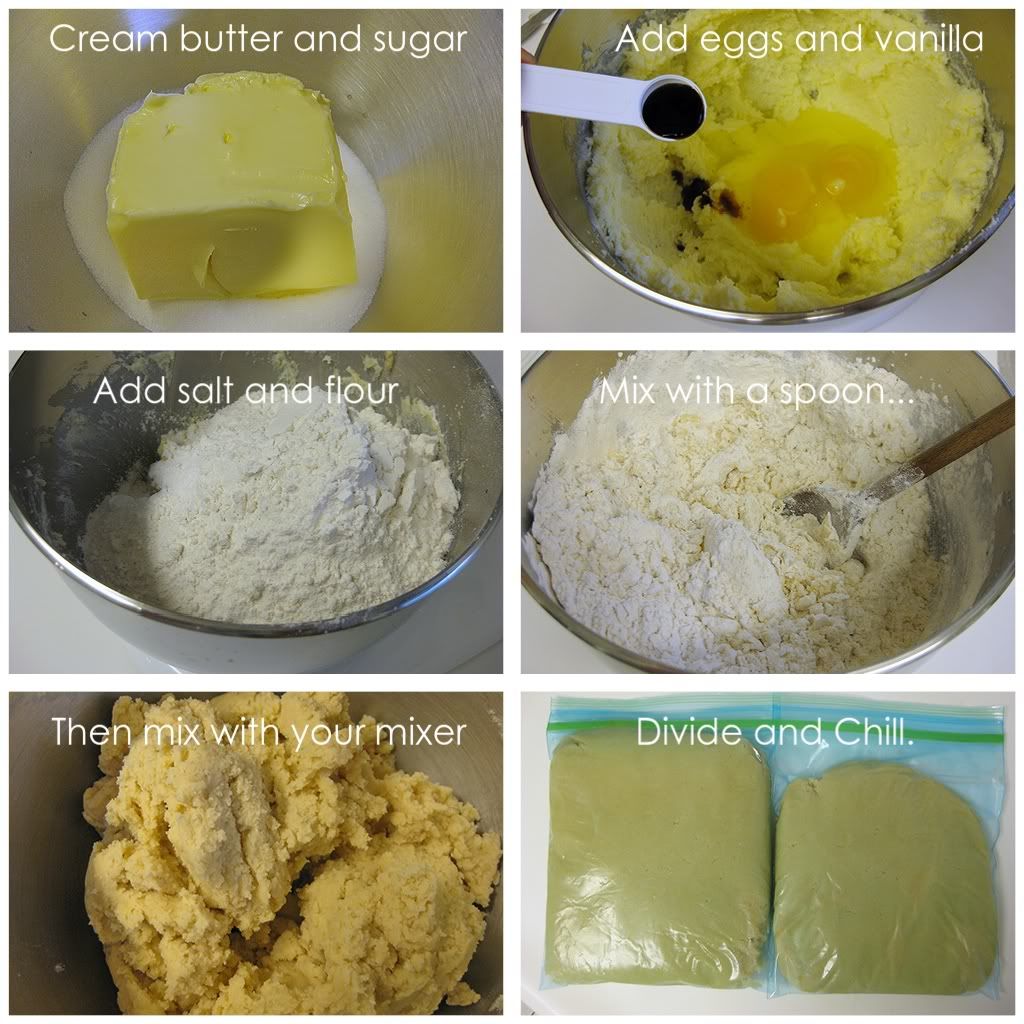
We made the cookies using this sugar cookie recipe.   I doubled all of the ingredients so we would have enough cookies to share.  Whenever I am short on time, I go back to this recipe because it's easy (all the ingredients are always in my pantry) and mixing the dough takes about 5 minutes.

So easy!

Here are the cookies READY to be iced.  Baby Bunny knows some words but it's funny how he's figured out very quickly to say "one coogie" and "just one". 

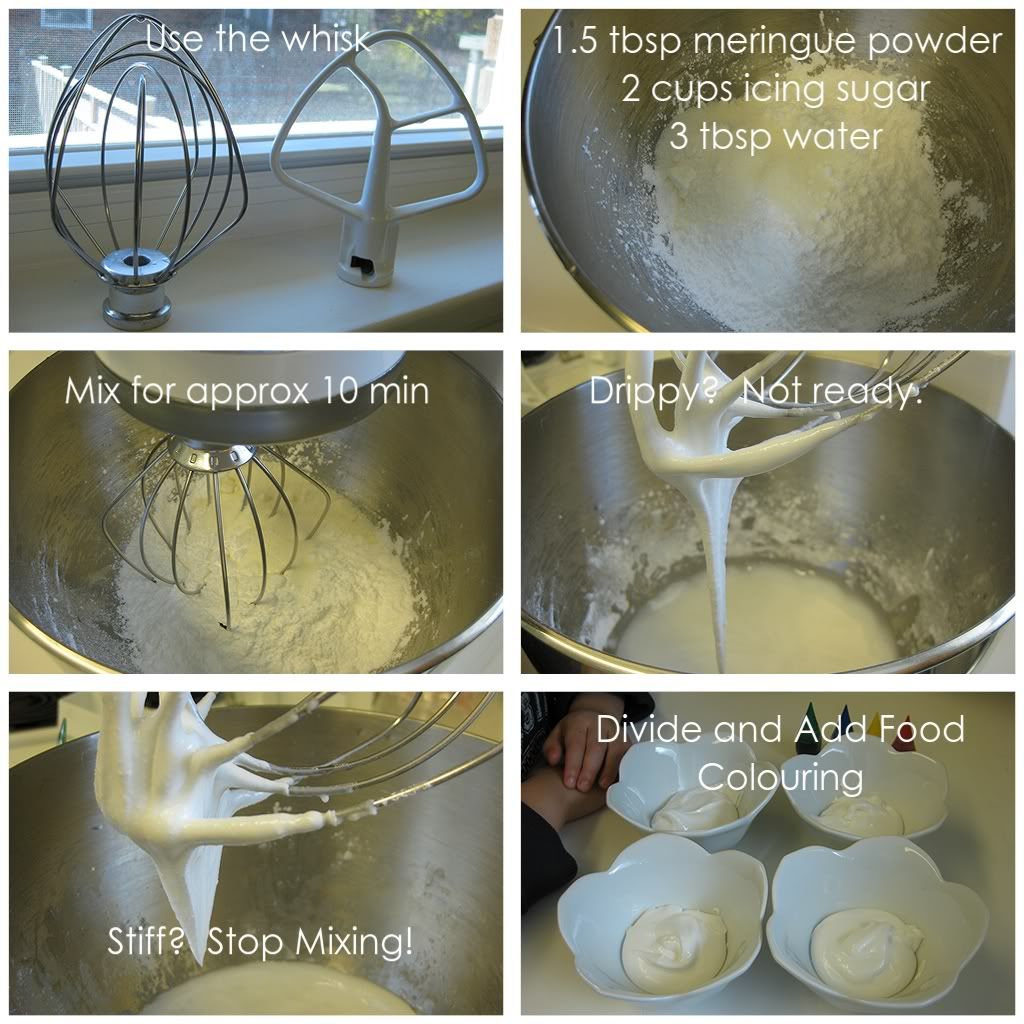
Now to the fun part... which is decorating the cookies with Royal Icing (recipe adapted from Wilton.com)

Ingredients:
1.5 TBSP Meringue Powder
2 Cups Icing Sugar
3 TBSP warm water
Food colouring

Instructions:
1.  Beat all ingredients until peaks form (approx 10 min)
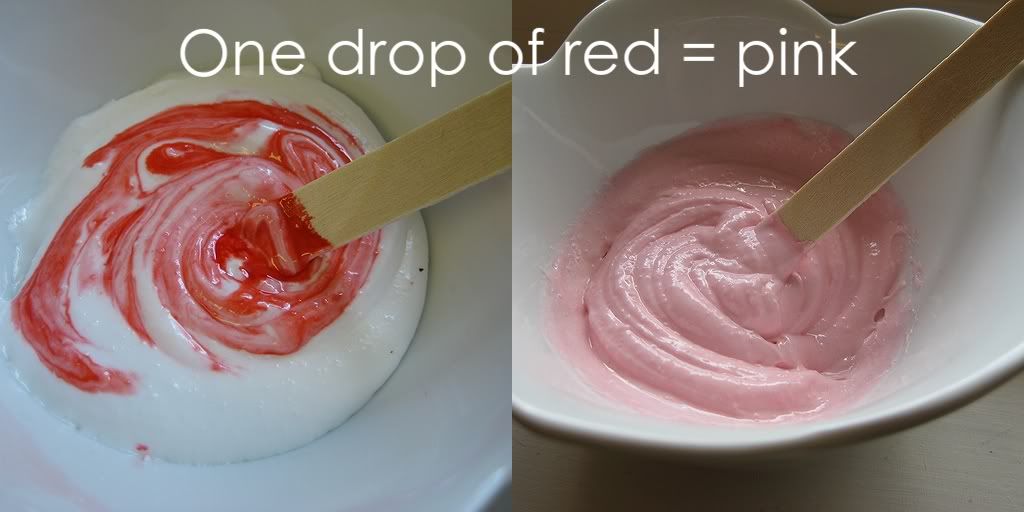
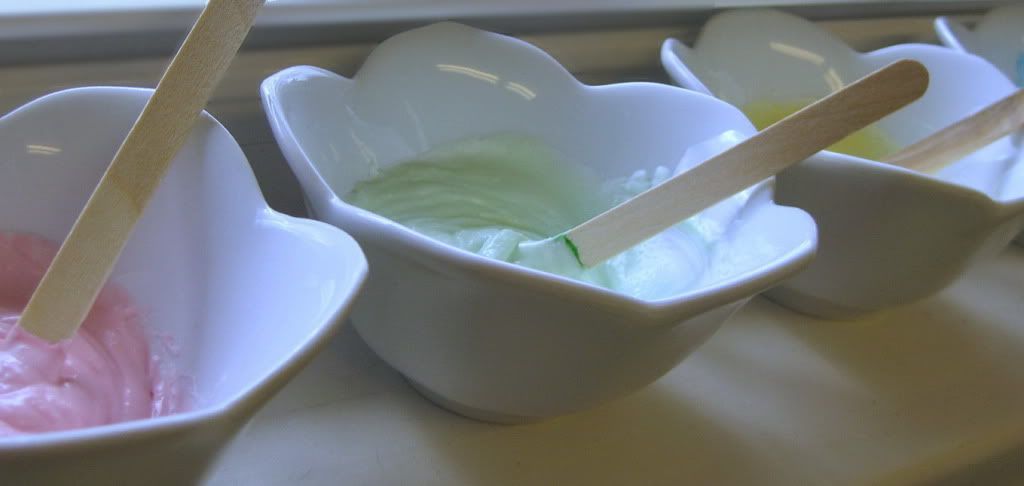
2.  Separate into individual batches and add 1-2 drops food colouring

I always test it first on the back of a spoon.  If it hardens within an hour, then I know I did it right.

Joshie was patiently waiting for his turn to stir the icing.  Meanwhile, Baby Bunny was running around the house with sugar on his face!

Remember, don't add too much food colouring at once.  Try it one drop at a time.


Ready to start icing!!

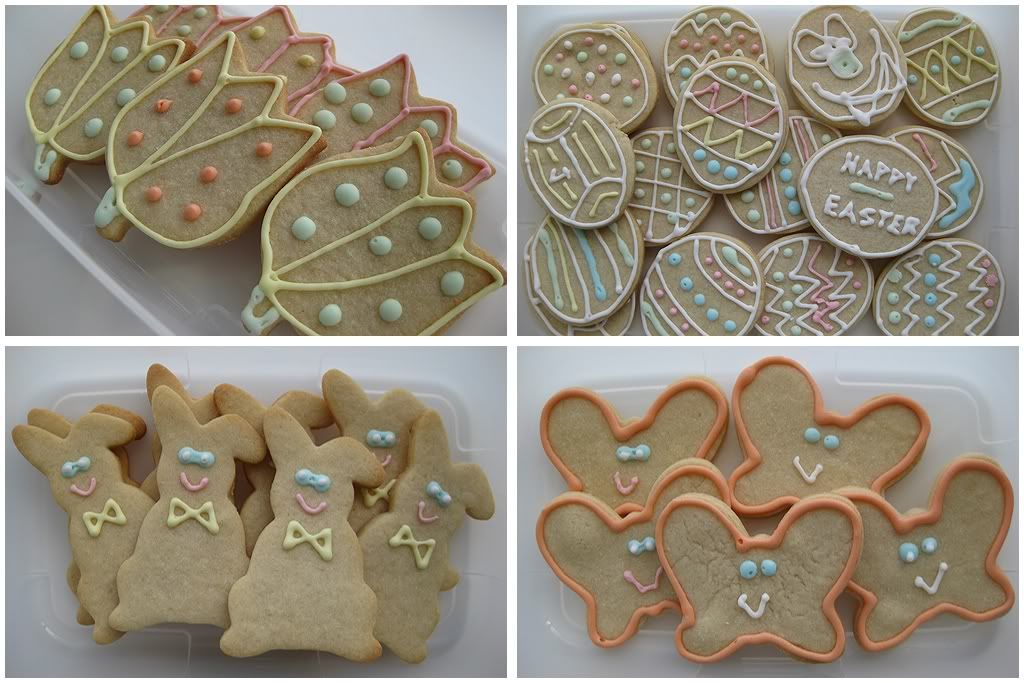
We made all kinds of shapes.  The eggs were the most popular followed by the bunnies.  Unfortunately I made the blue icing too runny so our bunny's have masks over their eyes.  Next time I will forgo the icing.  The kids loved the cookies when they were un-iced but the minute the icing sugar came out, they just wanted to lick the cookie.


Now to get ready for our easter egg hunt!

Happy Easter!

Tuesday, March 20, 2012

Recipe: Lime Chiffon Pie


Spring is in the air!  I love spring... fresh air, chirpy birds, and no more winter jackets!  It also means lighter tasting desserts.   One of my favourite spring/summer desserts is Lime Chiffon Pie.  I found this recipe for a lime chiffon pie a couple of years ago on the Kraft Canada website and I still love it.   I modified the recipe by adding the zest and juice of 1 whole lime.

I made the pie yesterday when the kids were sleeping.   Thank you kids!

Ingredients
2/3 cup boiling water
1 pkg. (0.3 oz.) JELL-O Lime Flavor Sugar Free Gelatin
Ice cubes
1/2 cup cold water
2 cups thawed COOL WHIP FREE Whipped Topping
lime zest from 1 lime
lime juice from 1 lime
1 ready-to-use reduced-fat graham cracker crumb crust (6 oz.) or a tart shell

Directions:
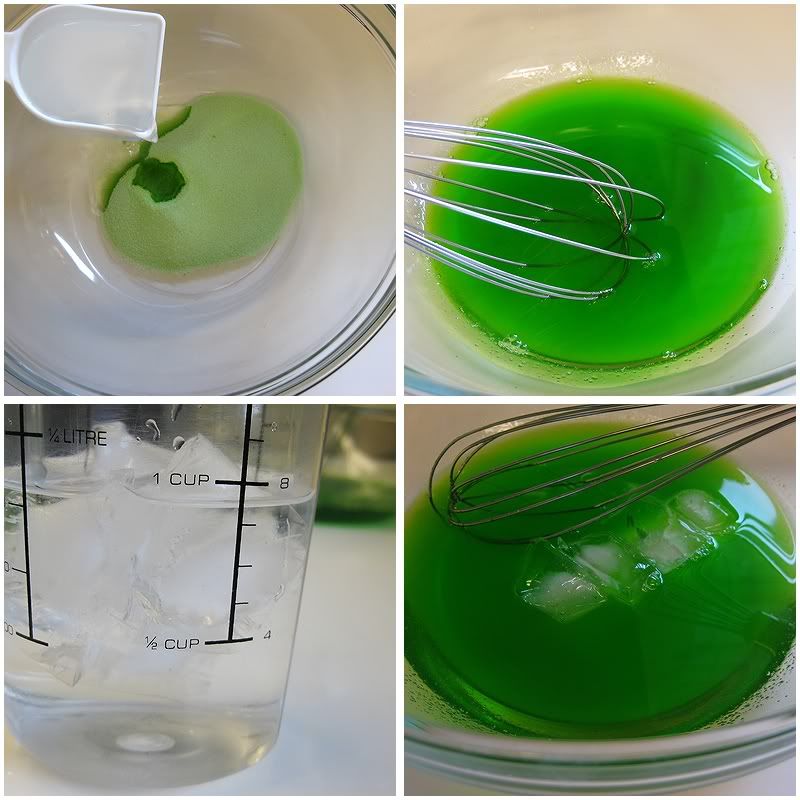
ADD boiling water to gelatin mix in large bowl; stir with whisk 2 min. until completely dissolved. Add enough ice to cold water to measure 1 cup. Add to gelatin; stir until ice is melted.
STIR in COOL WHIP, zest and juice. Refrigerate 15 to 20 min. or until mixture is very thick and will mound. Spoon into crust.
REFRIGERATE 4 hours or until firm.


This is what it looks like when you pour it into the pie shell.  It looks exactly the same after its been refrigerated.


Happy Eating!